 Save
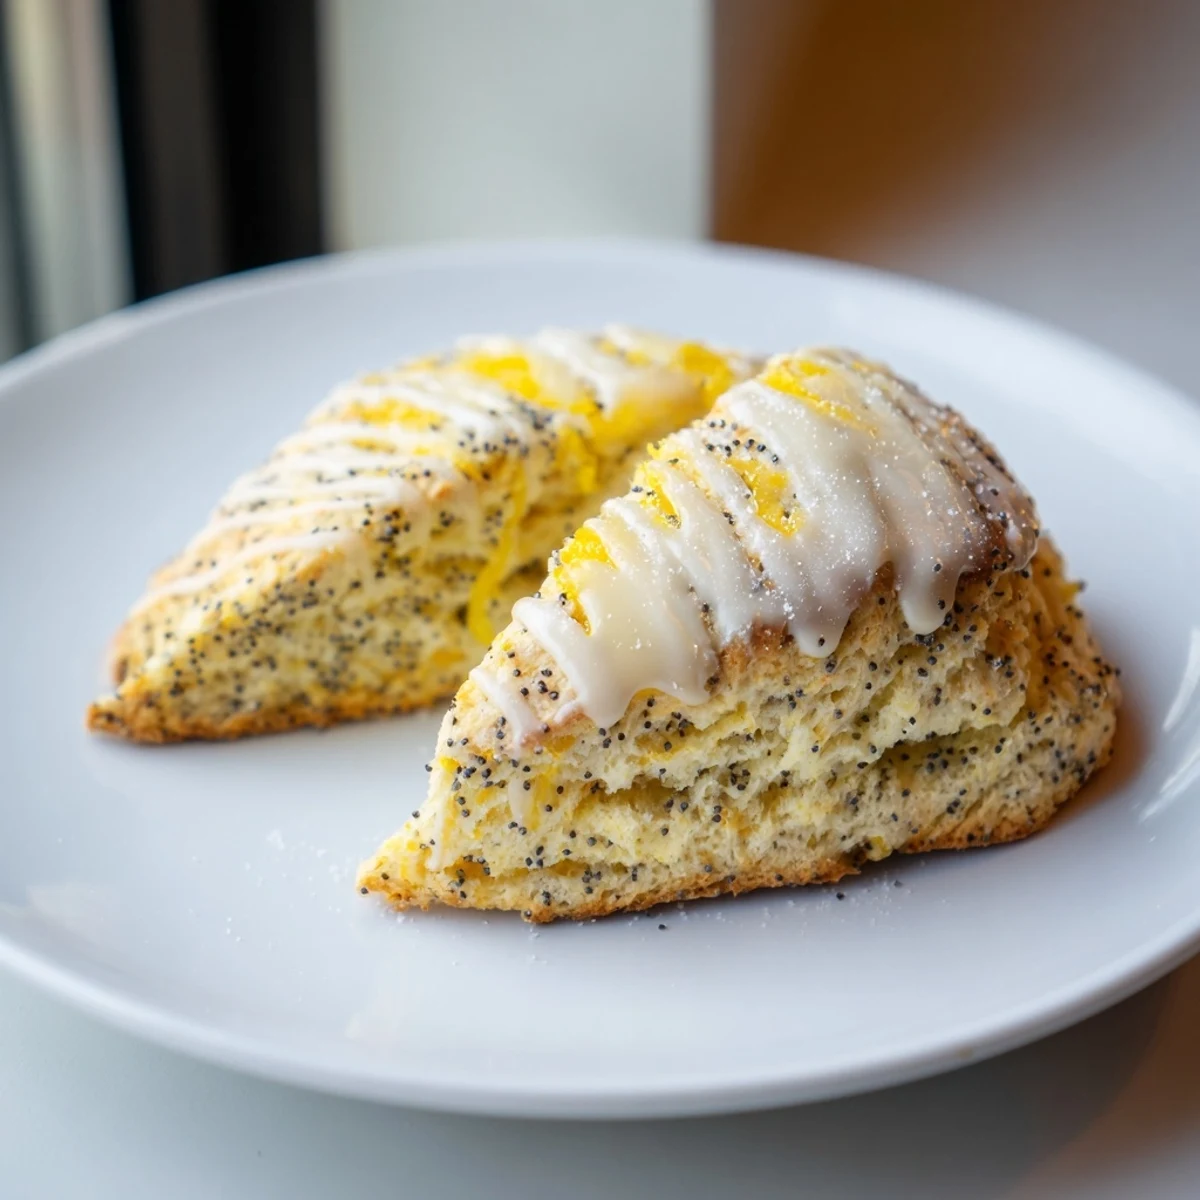
Save These buttery scones combine bright lemon zest, freshly squeezed juice, and crunchy poppy seeds for a delightful flavor contrast. The dough is carefully mixed to preserve tenderness, then shaped into wedges and baked until golden. Optional glaze adds a smooth citrus finish. Ideal for breakfast, brunch, or an afternoon snack paired with tea, they offer a simple yet flavorful baked delight.
I still remember the first time I made these lemon poppy seed scones on a lazy Saturday morning, wanting to recreate that bakery magic at home. The way the kitchen filled with the brightness of fresh lemon and the subtle nuttiness of poppy seeds had me hooked instantly, and now they're my go-to when I want something special that doesn't demand hours in the kitchen.
I'll never forget the day unexpected guests popped by unannounced, and I pulled a batch of these warm from the oven. Their faces when they bit into that tender crumb and hit the burst of lemon flavor was worth every bit of effort. That moment taught me that the simplest things, made with intention, become the most memorable.
Ingredients
- All-purpose flour (2 cups): This is your foundation, and keeping it measured correctly matters more than you'd think for getting that tender crumb
- Granulated sugar (1/3 cup): Just enough sweetness to let the lemon shine without overshadowing it
- Poppy seeds (1 tbsp): Those little specks of nuttiness that give the scones their character and crunch
- Lemon zest (1 tbsp): This is where the magic lives; use a microplane and don't skimp here
- Baking powder and baking soda (2 tsp and 1/2 tsp): The dynamic duo that gives you that tender, crumbly texture
- Salt (1/4 tsp): A tiny pinch that somehow makes everything taste more like itself
- Cold unsalted butter (1/2 cup): Cold is non-negotiable here; it's what creates those delicate layers
- Heavy cream (2/3 cup): The secret to tender scones; reach for the real thing, not substitutes
- Egg (1 large): Your binder, keeping everything together without making them dense
- Freshly squeezed lemon juice (2 tbsp): Fresh juice, always; bottled just doesn't sing the same song
- Pure vanilla extract (1 tsp): A gentle backdrop that lets the lemon take center stage
- Powdered sugar (1 cup) and lemon juice (2-3 tbsp): Optional, but that glaze makes them feel even more special
Instructions
- Get Everything Ready:
- Preheat your oven to 400°F and line a baking sheet with parchment paper. There's something grounding about this step, setting the stage for what's about to happen.
- Create Your Dry Foundation:
- In a large bowl, whisk together the flour, sugar, poppy seeds, lemon zest, baking powder, baking soda, and salt. You'll notice how the zest flecks everything with brightness; this is the moment the kitchen starts to smell like something good.
- The Part Where Magic Happens:
- Add your cold, cubed butter to the dry ingredients. Using a pastry cutter or your fingertips, work the butter in until the mixture looks like coarse crumbs. This step takes patience, but it's worth it; those little butter pieces are what create the tender layers you're after.
- Combine the Wet Ingredients:
- In a separate bowl, whisk together the heavy cream, egg, lemon juice, and vanilla. You'll feel the acidity of the lemon in the air, bright and promising.
- Bring It All Together (But Gently):
- Pour the wet ingredients into the dry ingredients and stir gently until just combined. This is where restraint matters; overmixing develops gluten and you'll lose that tender crumb you've been working for. Stop as soon as you can't see dry flour.
- Shape Your Dough:
- Turn the dough onto a lightly floured surface and shape it into a 1-inch thick round disk. Cut it into 8 wedges as if you're slicing a pie, then transfer each piece to your prepared baking sheet. You'll feel how soft and buttery the dough is under your hands.
- The Golden Touch:
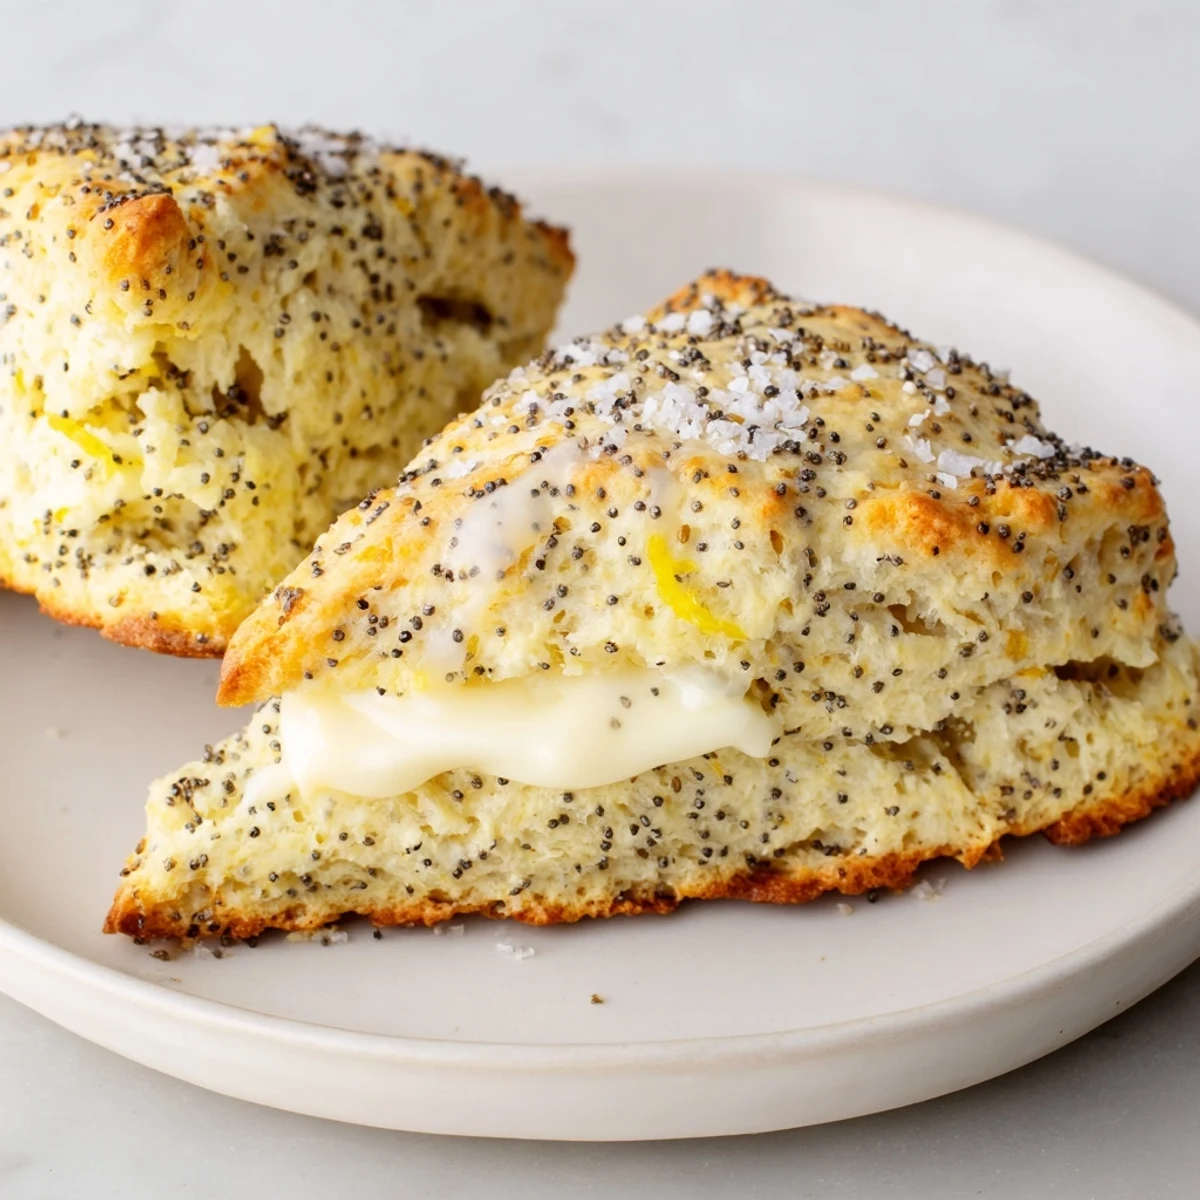
- Brush the tops with a bit of extra cream. This gives you that gorgeous golden color that's almost as good looking as it tastes.
- Into the Oven:
- Bake for 16 to 18 minutes until golden brown. Your kitchen will fill with an aroma that's impossible to ignore, and that's your signal they're almost ready.
- Cool and Finish:
- Let them cool on a wire rack. If you're making the glaze, whisk powdered sugar and lemon juice until smooth, then drizzle over the cooled scones. This step is optional but recommended if you want that extra touch of elegance.
 Save
Save These scones have become more than just breakfast for me; they're the edible equivalent of a warm kitchen on a cool morning, the thing I make when I want to say without words that someone matters. There's something about handing someone a still-warm scone with butter and jam that says more than any fancy dessert ever could.
Keeping It Fresh
These scones are best enjoyed fresh, ideally within a few hours of baking while they still have that tender crumb and buttery warmth. If you find yourself with leftovers, which is rare, they'll keep for about a day in an airtight container, though they lose some of their magic overnight.
When You're Missing Something
The beauty of scones is their flexibility, and I've found you can swap and adapt without losing the soul of the recipe. Orange zest creates a warmer citrus note, and I've had success adding a touch of almond extract for depth, though you have to be gentle with it. Some days when I'm feeling adventurous, I'll add a handful of white chocolate chips, which feels almost indulgent.
Serving Ideas That Clicked
I've learned that the presentation matters almost as much as the taste. Serve these still warm with good butter, fresh jam, or clotted cream if you're feeling traditional and British about it. A hot cup of Earl Grey or jasmine tea is non-negotiable in my kitchen, but I've also paired them with champagne for brunch and they held their own beautifully. Here are a few final thoughts as you head into your kitchen:
- For extra crunch and visual appeal, sprinkle coarse sugar on top right before they go into the oven
- These freeze remarkably well; if you're making a double batch, freeze the extras in an airtight container and reheat gently before serving
- Don't skip the parchment paper; it saves you cleanup and ensures even browning on the bottom
 Save
Save There's something deeply satisfying about pulling a batch of golden scones from the oven knowing you made something that tastes like it came straight from a London tearoom. I hope these become as much a part of your kitchen routine as they've become part of mine.
Recipe FAQ
- → What gives these scones their lemon flavor?
-
Fresh lemon zest and freshly squeezed lemon juice are used to infuse the dough with vibrant citrus notes.
- → How do poppy seeds affect the scones’ texture?
-
Poppy seeds add a subtle crunch that contrasts with the tender crumb for added interest in each bite.
- → Can I prepare the dough ahead of time?
-
Yes, the dough can be refrigerated briefly before baking to help maintain its structure and enhance flavors.
- → What is the purpose of brushing cream on top before baking?
-
Brushing cream creates a golden, slightly glossy crust that enhances visual appeal and texture.
- → Is the optional glaze necessary?
-
No, but the lemon glaze adds a sweet and tangy finish that complements the scones’ citrus notes beautifully.