 Save
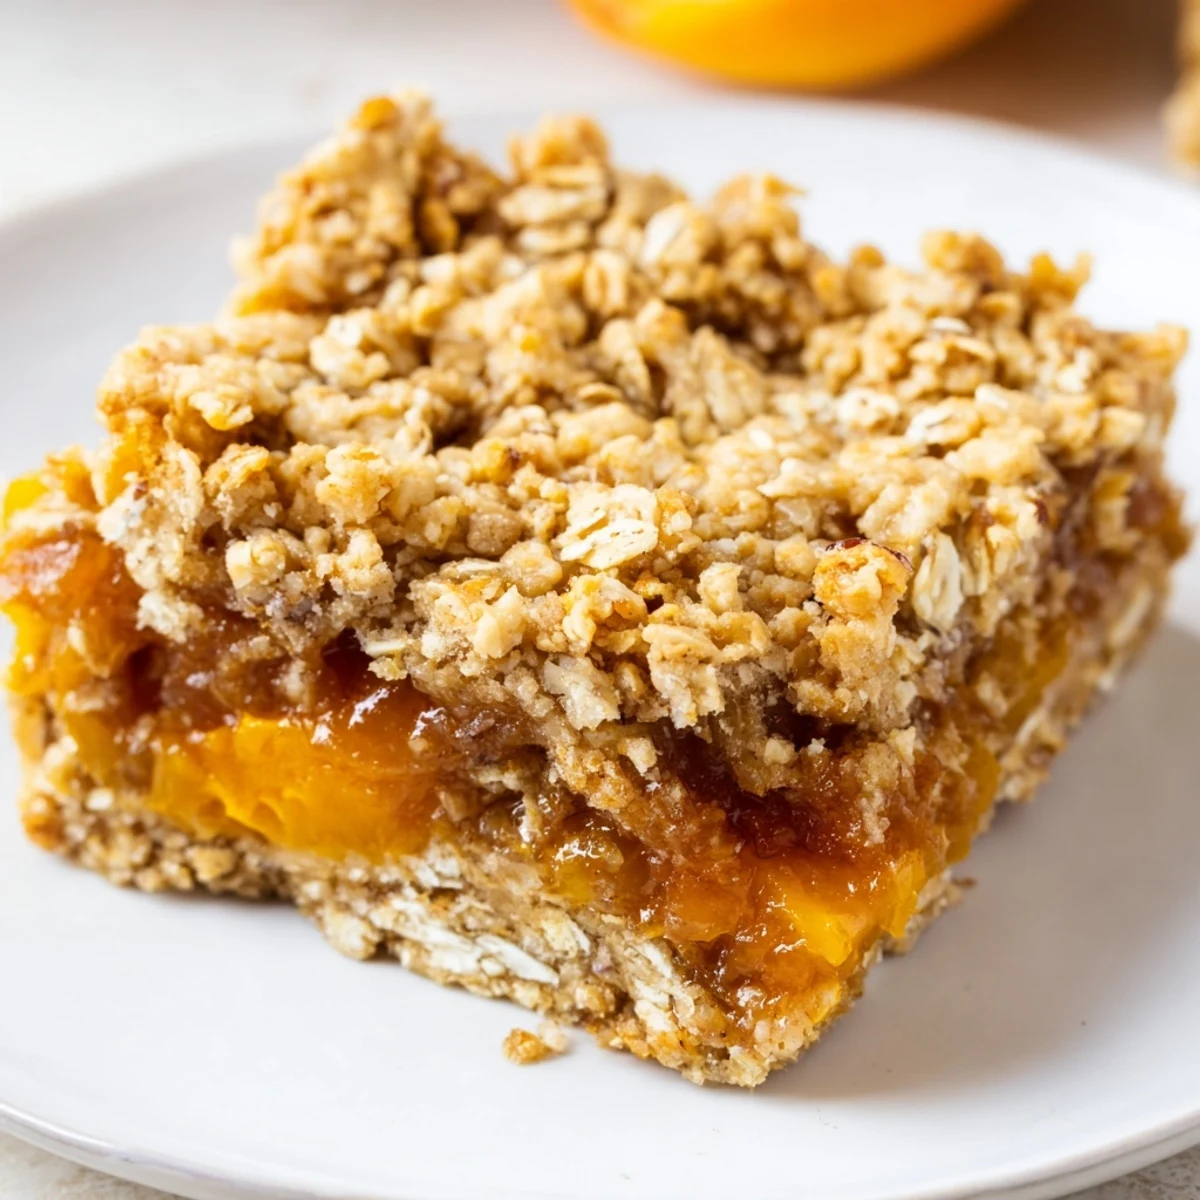
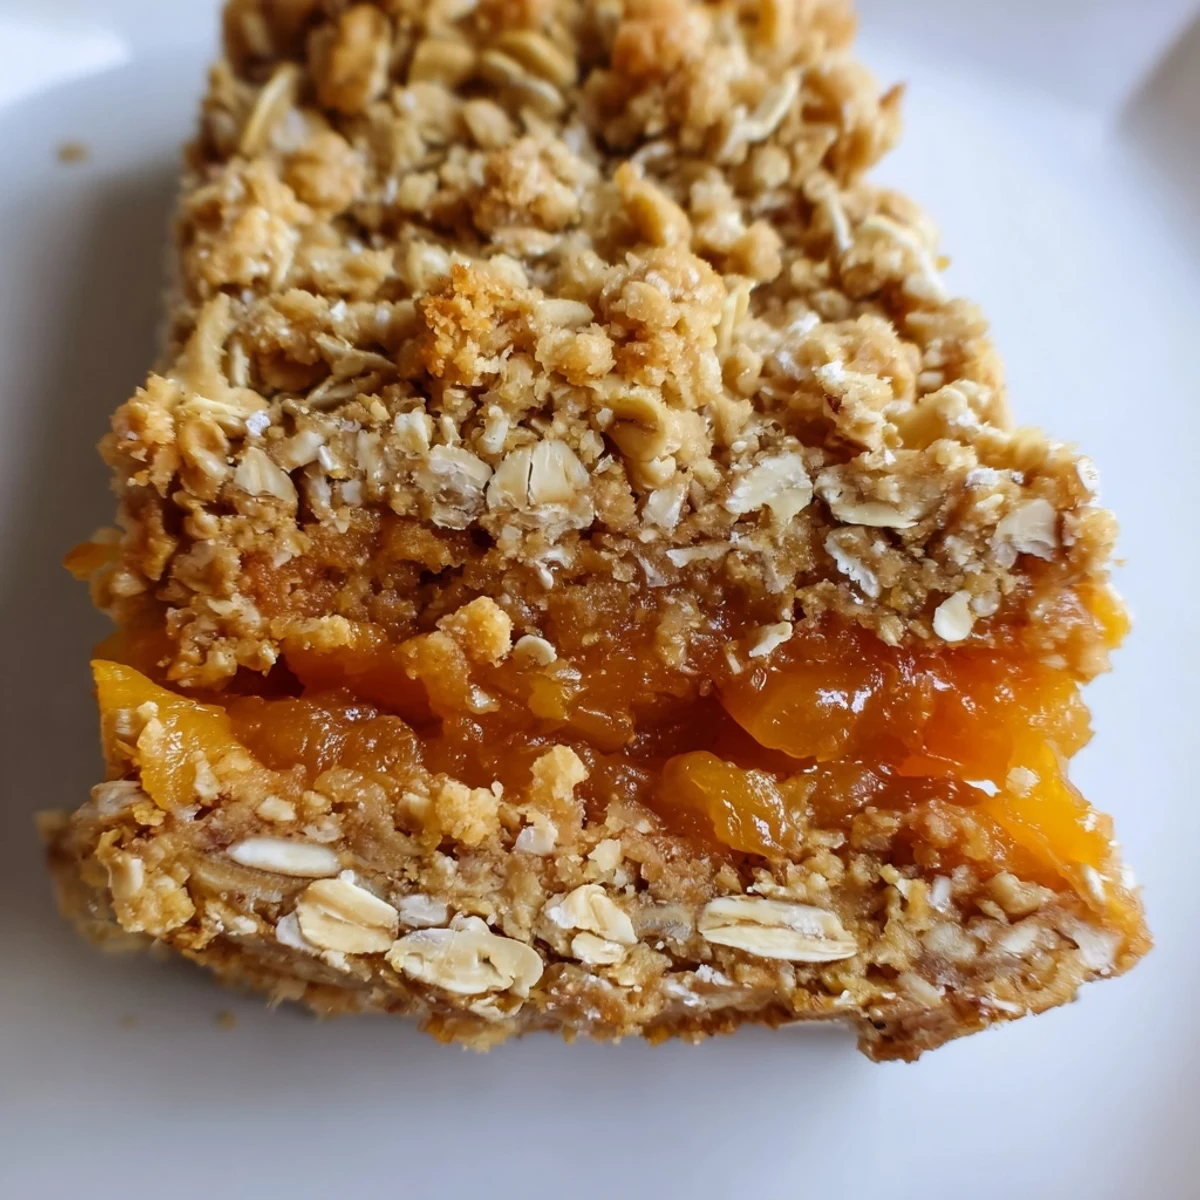
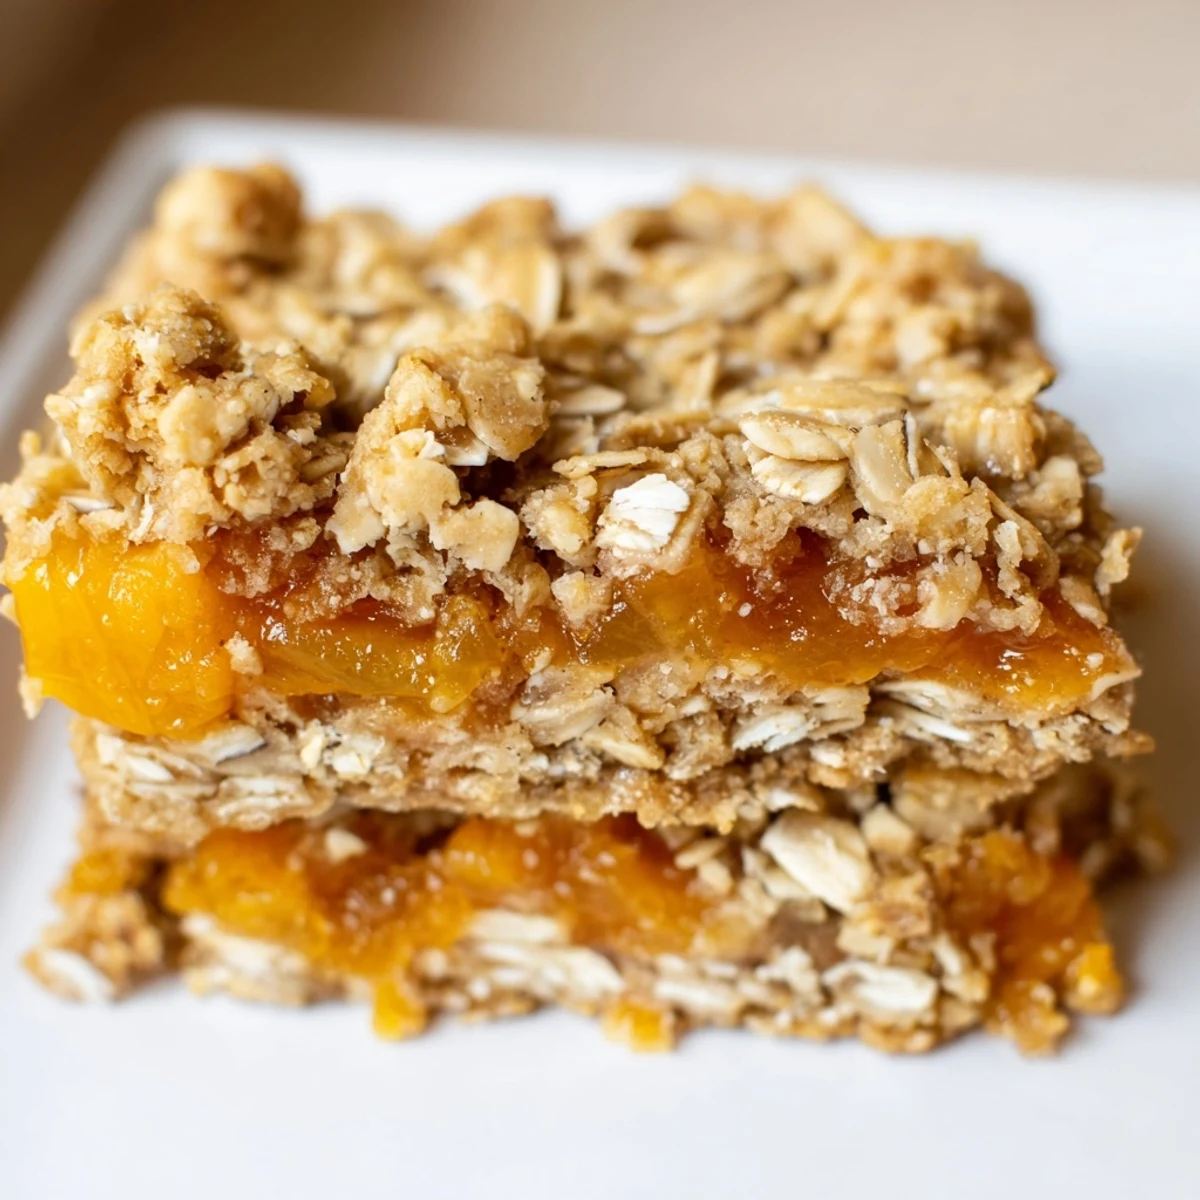
Save These chewy oatmeal bars combine tender dried apricots with hearty gluten-free oats for a satisfying breakfast or snack. The apricot filling, simmered with orange juice and honey, creates a sweet jammy layer that pairs perfectly with the crumbly oat base. Ready in just 45 minutes, these bars store well for several days and can easily be made vegan with simple substitutions.
The smell of apricots simmering with orange juice and honey transports me right back to my grandmother's kitchen. She would make fruit compotes while I sat at the counter, swinging my legs and watching the steam curl up toward the ceiling. These oatmeal bars capture that same cozy sweetness but with a chewy, portable texture perfect for busy mornings. I've adapted her approach into a gluten-free treat that feels both nostalgic and new.
Last autumn, I brought a batch of these to a potluck where my friend Sarah, who has celiac disease, hesitated before trying them. Watching her eyes light up after that first bite reminded me why developing inclusive recipes matters so much. She hugged the container of leftovers like it was treasure, and now I keep a stash in my freezer just in case she stops by unexpectedly.
Ingredients
- 2 cups gluten-free rolled oats: Certified GF oats are essential here, and I've found that thick-cut rolled oats hold their texture better than quick-cooking varieties
- 1 cup almond flour: This adds subtle richness and helps bind the bars without wheat, though oat flour works as a nut-free alternative
- 1/2 cup light brown sugar, packed: The molasses notes deepen the caramel flavor during baking, and packing it down ensures accurate measuring
- 1/2 teaspoon ground cinnamon: Just enough to warm up the background without competing with the apricots
- 1/2 teaspoon baking soda: Helps the oat crumb lift slightly so it's not too dense
- 1/4 teaspoon salt: Essential for balancing all that sweet fruit and maple syrup
- 1/2 cup unsalted butter, melted and cooled: I let it cool to room temp so it doesn't scramble the egg when everything mixes together
- 1/4 cup pure maple syrup: Adds a lovely depth that white sugar can't match, and keeps the bars moist
- 1 large egg, room temperature: Room temp eggs incorporate more evenly into the dough
- 1 teaspoon pure vanilla extract: Don't skimp here, it bridges the gap between the oats and fruit
- 1 1/2 cups dried apricots, chopped: I chop them into raisin-sized pieces so they distribute evenly throughout the filling
- 1/3 cup orange juice: Freshly squeezed makes a noticeable difference in the filling's brightness
- 2 tablespoons honey: Helps the apricots break down into that jammy consistency we want
- 1 teaspoon lemon zest: This little spark cuts through the sweetness and makes the fruit flavor pop
Instructions
- Preheat your oven to 350°F (175°C) and line an 8-inch square pan with parchment paper.
- Leave enough overhang on two sides so you can lift the whole batch out later like a cake. I learned this trick after too many batches stuck to the bottom despite greasing.
- Simmer the apricot filling on the stove.
- Combine the chopped apricots, orange juice, honey, and lemon zest in a small saucepan over medium heat. Let it bubble gently for 8-10 minutes, stirring now and then, until the apricots soften completely and the mixture thickens into a jam-like consistency. Set it aside to cool while you make the crust.
- Whisk together your dry ingredients in a large bowl.
- The oats, almond flour, brown sugar, cinnamon, baking soda, and salt should be well combined so you don't end up with pockets of baking soda in your finished bars.
- Mix the wet ingredients in a separate bowl.
- Whisk the melted butter, maple syrup, egg, and vanilla until they're completely smooth and slightly thickened.
- Combine wet and dry ingredients.
- Pour the wet mixture into the dry and stir until everything is evenly coated and crumbly. The dough should hold together when you squeeze it.
- Press most of the dough into the pan.
- Use about two-thirds of the oat mixture, pressing it firmly into the bottom of your prepared pan. I use the bottom of a measuring cup to get it nice and even.
- Spread the apricot filling over the base.
- Use a spoon to distribute it evenly, leaving a small border around the edges if you want a cleaner look.
- Scatter the remaining dough on top.
- Crumble the rest of the oat mixture over the apricot layer, then press down gently so it adheres. Some fruit showing through is beautiful.
- Bake until golden.
- 25-30 minutes should do it, but watch for that gorgeous golden brown color on top. The edges should be set and slightly pulling away from the pan.
- Cool completely before slicing.
- This is the hardest part but absolutely essential. Let them cool completely in the pan, then lift them out using the parchment handles and cut into 12 bars.
 Save
Save My neighbor texted me at 11 PM one night, desperate for something to bring to her daughter's school bake sale the next morning. I walked a batch of these over still warm from the oven, and she called me later to say they'd sold out first. There's something about homemade bars that feels more special than cookies, maybe because they seem more thoughtful.
Make It Your Own
I've swapped dried figs and chopped dates for the apricots when that's what I had in the pantry. Once I used dried cranberries and added a pinch of ginger to the filling, which gave them a lovely holiday twist. The base is versatile enough to handle whatever dried fruit speaks to you.
Storage Secrets
These bars actually improve after a day or two as the flavors meld and the oat layer softens slightly from the fruit filling. I keep them in an airtight container at room temperature for up to five days, though they rarely last that long. For longer storage, wrap individual bars in plastic and freeze them, then thaw at room temperature for about an hour.
Serving Ideas
Sometimes I warm a bar in the microwave for 15 seconds and top it with a dollop of Greek yogurt for breakfast. They're also perfect with afternoon tea or coffee, the buttery oats complementing whatever you're drinking. My kids love them in lunchboxes, and I feel good knowing they're eating something homemade without too much processed sugar.
- Try crumbled over vanilla ice cream for an unexpected dessert
- Pack them for hiking or road trips since they hold up well
- Wrap in parchment and tie with twine for a simple homemade gift
 Save
Save There's something deeply satisfying about a recipe that comes together so simply yet tastes like it took hours. I hope these bars find their way into your regular rotation, bringing a little sweetness to your everyday moments.
Recipe FAQ
- → Can I use other dried fruits instead of apricots?
-
Yes, dried figs, dates, or chopped dried cranberries work beautifully as alternatives to apricots. Adjust the simmering time slightly based on the fruit's moisture content.
- → How should I store these bars?
-
Store in an airtight container at room temperature for up to 5 days. For longer storage, wrap individually and freeze for up to 3 months.
- → Are these bars completely gluten-free?
-
Yes, when using certified gluten-free oats and almond flour. Always check labels to ensure all ingredients are processed in gluten-free facilities if you have celiac disease.
- → Can I make these dairy-free or vegan?
-
Substitute melted butter with coconut oil or vegan butter. Replace the egg with a flax egg (1 tablespoon ground flaxseed mixed with 3 tablespoons water, let sit 5 minutes).
- → Why do I need to let the bars cool completely?
-
Allowing the bars to cool fully helps them set properly and prevents crumbling when sliced. The oat mixture needs time to firm up for clean cuts.