 Save
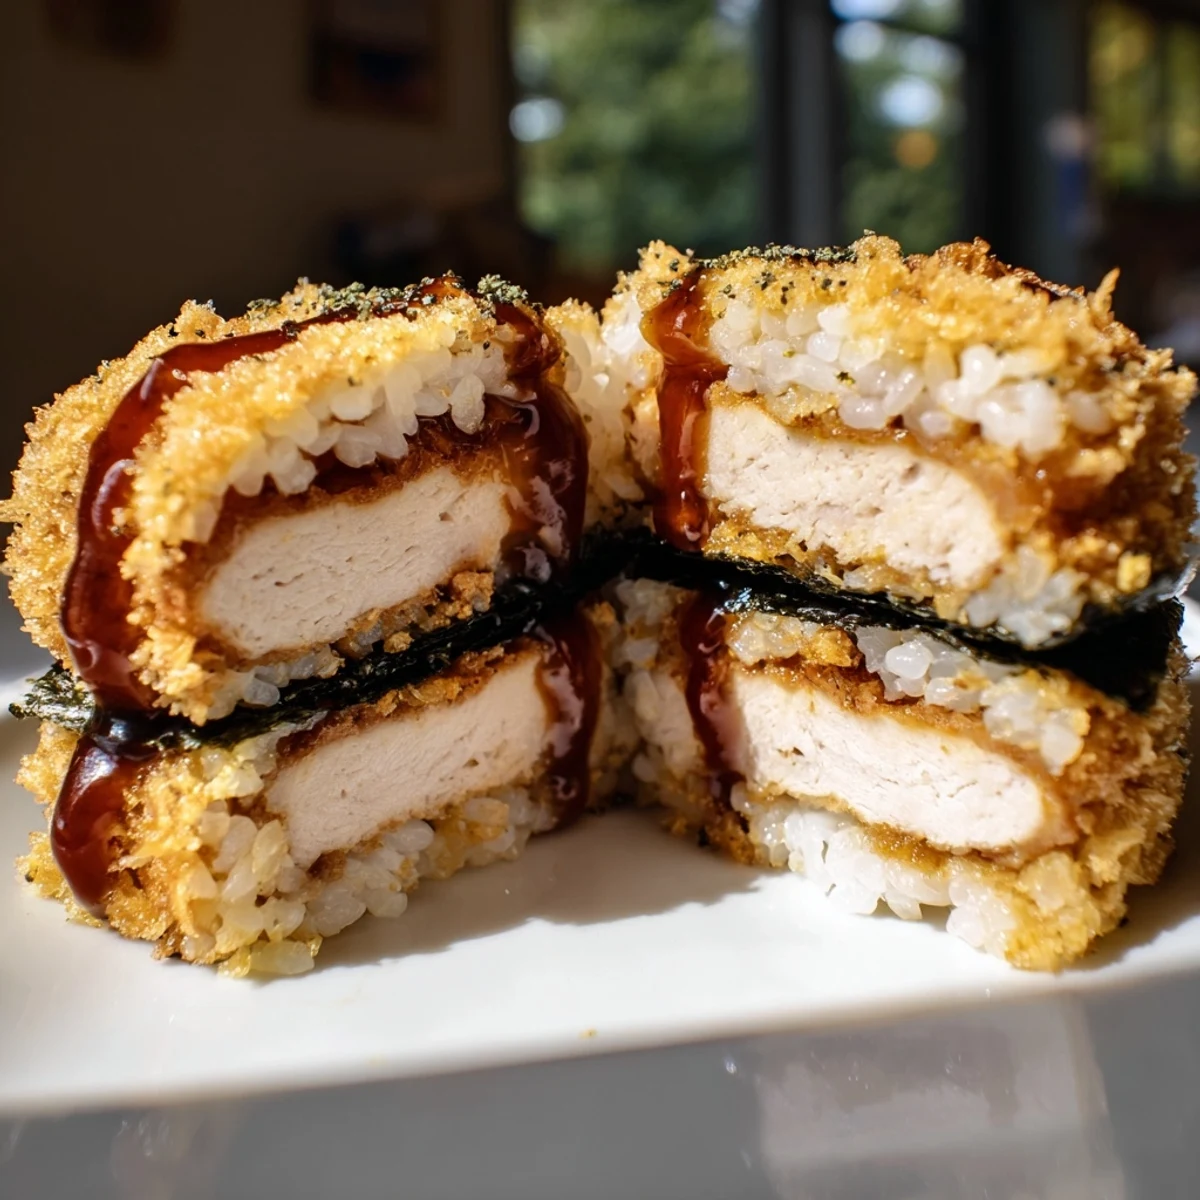
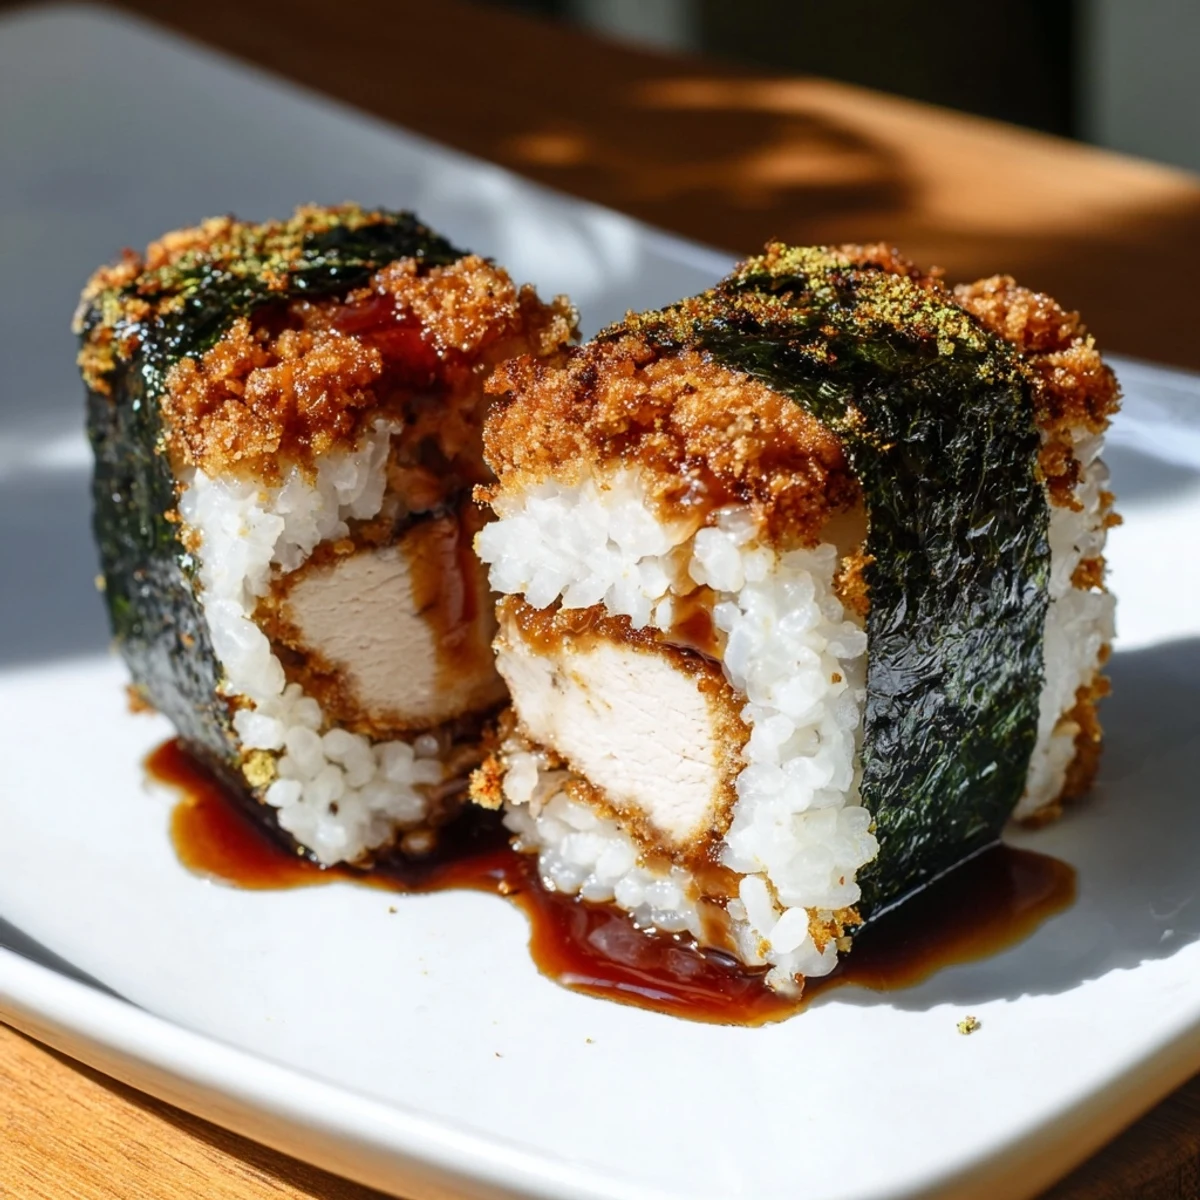
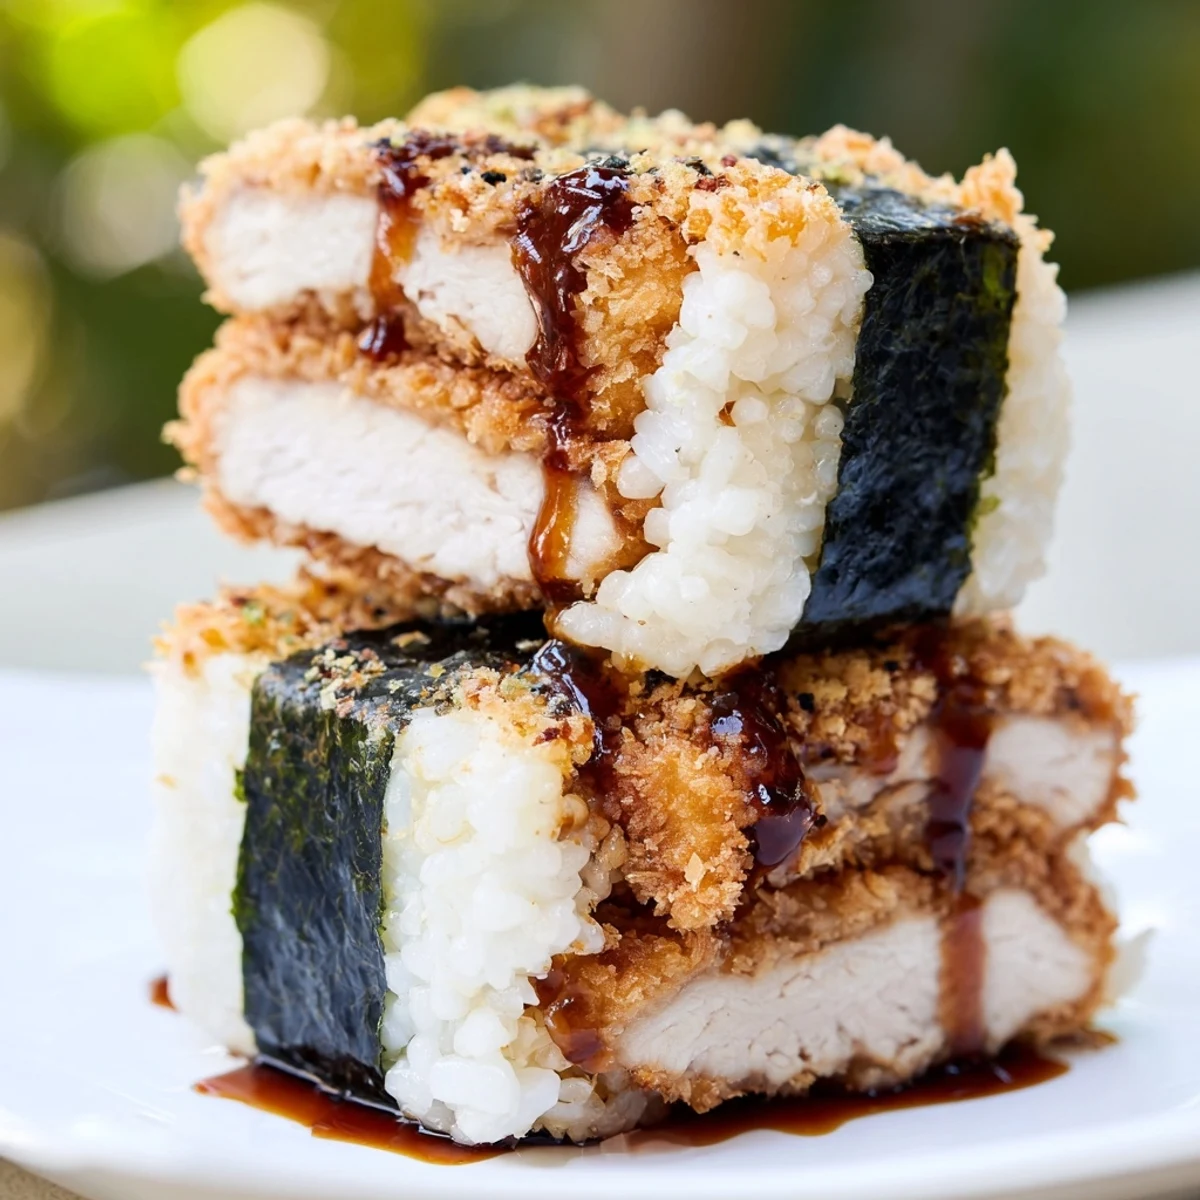
Save This Hawaiian-Japanese fusion combines crispy panko-coated chicken thighs with vinegared short-grain rice, all wrapped in nori seaweed. The dish features a homemade sauce blending tonkatsu, soy sauce, and honey for the perfect balance of sweet and savory. Each musubi gets pressed into compact rectangles, making them ideal for on-the-go eating. The contrast between the crunchy chicken exterior and soft, seasoned rice creates a satisfying texture profile that's both comforting and convenient.
The first time I bit into chicken katsu musubi at a tiny hole-in-the-wall in Honolulu, I honestly couldn't believe how something so simple could taste that perfect. The crunch against soft rice, that sweet-savory sauce soaking into everything, and the nori holding it all together like an edible gift wrapper. I went back three times that week, and each visit felt like discovering a secret the whole island already knew.
Last summer, I made these for a beach picnic with friends and watched them disappear faster than anything else I'd brought. Someone actually asked if I'd flown them in from Hawaii, which made me laugh because the truth is so much simpler. They're just that perfect kind of handheld food that makes people stop and really enjoy what they're eating.
Ingredients
- Chicken thighs: Stay juicier than breast and have more flavor, which matters when you're frying them
- Panko breadcrumbs: Create that impossibly light and airy crunch that regular crumbs can't match
- Short-grain rice: Essential because it sticks together enough to hold its shape when wrapped
- Rice vinegar mixture: Keeps the rice fluffy and adds that subtle brightness you taste in good musubi
- Nori sheets: Halved works perfectly for wrapping and becomes tender as it sits
- Tonkatsu sauce: The backbone of that classic flavor, but the honey addition makes it stick beautifully to the chicken
Instructions
- Crisp the chicken:
- Pound those thighs until they're even in thickness, season them generously, then coat them in flour, egg mixture, and panko. Fry in hot oil until they're golden brown and cooked through, then drain and slice into strips that fit your musubi shape.
- Season the rice:
- Mix rice vinegar, sugar, and salt until dissolved, then fold it gently into your warm rice. Let it cool just enough to handle without burning your hands.
- Make the magic sauce:
- Whisk together tonkatsu sauce, soy sauce, and honey until smooth. This thin glaze is what makes everything sing.
- Build each musubi:
- Lay nori shiny side down, press seasoned rice into a rectangle in the center, sprinkle with furikake if you want, top with chicken and sauce, add another rice layer, then wrap everything tight with plastic wrap to compress it. Let it sit briefly so the nori softens and holds its shape.
 Save
Save My niece now asks for these whenever she visits, and watching her small hands carefully unwrap each musubi like it's a present has become one of my favorite kitchen moments. Food does that sometimes, it turns a simple recipe into something people remember.
Making Them Ahead
I've learned these actually taste better after they've had about 30 minutes to rest. The nori softens, the sauce permeates the rice, and everything melds together beautifully. Wrap them tightly in plastic if you're packing them for lunch, but don't refrigerate if you can avoid it because cold rice loses its magic.
The Double Fry Secret
Once I tried double-frying the chicken like they do at some restaurants, and honestly, it changed everything. Fry once until cooked through, let it rest, then fry again briefly before assembling. The crunch stays crisp even after the sauce hits it, which is kind of a game-changer for texture.
Sauce Variations
Sometimes I add a tiny drop of Worcestershire or grate fresh ginger into the sauce for extra depth. The classic version is perfect, but playing with it helps you discover what your family loves most.
- Spam musubi follows the exact same technique if you want to try both
- A little Sriracha in the sauce creates a completely different but amazing variation
- Leftover sauce keeps in the fridge for weeks and is incredible on rice bowls
 Save
Save These little packages of joy have become my go-to for feeding people something that feels special without requiring hours of work. There's something deeply satisfying about hand food made with care.
Recipe FAQ
- → What makes chicken katsu musubi different from regular musubi?
-
Traditional musubi uses grilled Spam, while this version features crispy panko-breaded chicken katsu. The chicken adds extra protein and a satisfying crunch that complements the soft rice and nori wrapper.
- → Can I make chicken katsu musubi ahead of time?
-
Yes! These keep well for 4-6 hours at room temperature when wrapped tightly. For best texture, assemble them fresh but you can prepare the chicken and rice separately up to a day in advance.
- → What type of rice works best for musubi?
-
Short-grain Japanese rice is essential because its sticky texture holds the musubi shape together. Long-grain varieties won't bind properly and may cause your musubi to fall apart.
- → How do I get extra crispy chicken katsu?
-
Double-frying technique helps: fry once until cooked through, let rest, then fry again briefly for extra crunch. Also ensure your oil is at 350°F and don't overcrowd the pan.
- → Can I bake the chicken katsu instead of frying?
-
You can bake at 425°F for 20-25 minutes, flipping halfway, though the texture won't be quite as crispy or golden as fried. Spray the tops with oil cooking spray to help browning.
- → What's the purpose of rice vinegar in the rice?
-
The vinegar mixture seasons the rice and adds subtle tanginess that balances the rich fried chicken and savory sauce. It also helps preserve the rice slightly and enhances flavor absorption.